"Owl Love You!" Heart Owl Kids' Craft for Valentine's Day


This cute little "love" owl is almost entirely made out of hearts. Not only is it a fun craft for kids to do, but it is also without a doubt going to charm anyone lucky enough to be the receiver of such a Valentine.  Children of all ages will enjoy putting this together.


 Materials needed:
  • brown paper (grocery bags are perfect!)
  • red and pink construction paper
  • potatoes
  • linoleum cutter and/or paring knife
  • scissors
  • glue stick
  • ink pad
  • black marker
Potato shapes cut for: eyes, beak and heart texture
Preparation: Adult carves out potatoes in shapes shown above with linoleum block cutter and paring knife.


Preparation (continued): Depending on skill level of child, either adult or child cuts out 2 large brown symmetrical hearts (for head and body), 2 medium-sized brown symmetrical hearts (for wings), 4 tiny hearts (red paper for ears and talons), and 1 small heart (pink for Valentine note).


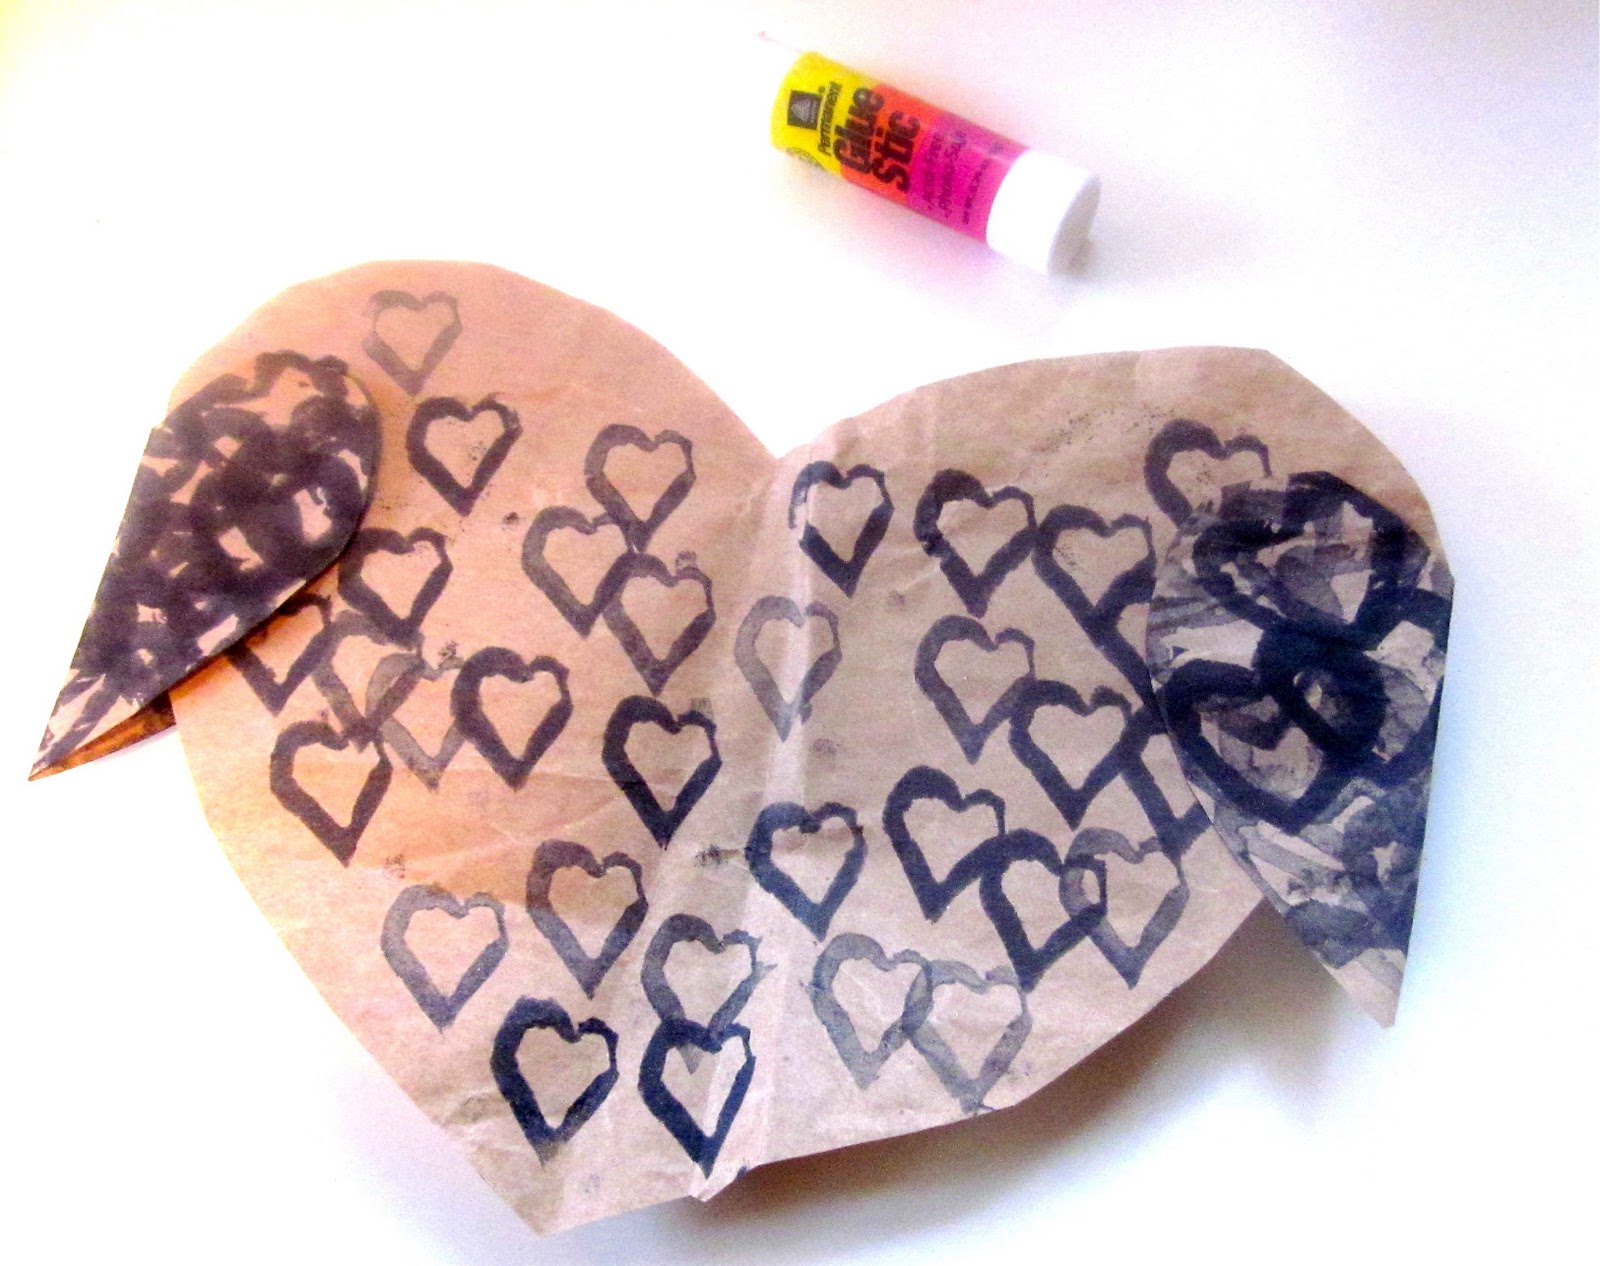
Step one: Using ink from ink pad and heart-shaped stamp, child presses pattern all over one of the big heart cut-outs (the body of the owl).


Step Two: Child presses heart shaped potato stamp all over both medium heart cut-outs (the wings of the owl) — this time making the pattern denser as to create contrast between body and wings.


Step three: Taking the other big heart cut-out, child folds it as shown so that a beak shape is formed between what-is-to-be the owl's 2 eyes.


 Step four: Unfold and stamp on beak.


Step five: Turn heart over and fold down beak. Stamp on eyes.

Head of owl complete: Beak and eyes stamped on folded heart

Step Six: Fold wings vertically and glue onto body of owl.


Step Seven: Glue down beak. Glue head onto owl's body in placement shown.


Step Eight: Glue on ears and talons as shown above.


Step Nine: Depending on skill level, adult or child writes "Owl love you" on pink heart. Glue on so that owl appears to be holding the Valentine note. Send off to child's Valentine!

I love to hear your comments! Please tell me what you think below!


Pin It!

Valentine's Day Love Banner: Tissue Paper Collage Craft for Children


For the past couple years, I think just about every crafter in the blogosphere has posted a tutorial on how to make a sewn fabric banner (AKA bunting). I think banners are a pretty cool and unique way to decorate a house's interior. I know that I have had my eye on a few projects out there to make for myself (here, here, and here).
Being that Valentine's Day is coming up, I thought a banner spelling out the word "LOVE" would be perfect. I modified this trendy craft so that it would be something that my son could partake in. Replacing the fabric, thread, and sewing machine with contact paper, construction paper, tissue paper plus a few tools of the trade, we were set to go!


Material List:

  • Tissue Paper in various colors, cut in 1-2" squares 
  • Black construction paper cut in quarters
  • Clear contact paper
  • X-ACTO knife and cutting mat
  • Scissors
  • Tacky Glue
  • String
  • Metal Ruler (optional)

Step one: With the X-ACTO knife, adult cuts out letter shapes from the black construction paper. For straight edges, use metal ruler as a guide. Use cutting mat to protect surface underneath. For the "O", cut out a smaller circle for the center.

Step two: Adult peels the backing off contact paper and places the construction paper FACE DOWN on the sticky surface. Make sure contact paper covers the full surface of black paper. Trim edges so that there is no contact paper extending past the outside edges of the black paper.


Step three: Have child place tissue paper squares one at a time on sticky surface. Encourage them to lay each piece down flat and to overlap the tissue paper so that the entire sticky surface is covered.


Step four: Turn it over to see how it looks. Arrange it in the order that you want it to hang. I decided to add two hearts to each side of the word "LOVE" for decoration's sake.


Step five: Flip up letters vertically so that the backsides are facing up.


Step six: Apply a bead of glue in placement shown.


Step six: Press on string (allow string to be long enough on both ends of banner in order to hang up). Let dry.


Step seven: Hang up in a window or doorway that gets a lot of light shining through from behind. Enjoy your child's craft!

Pin It!

Treasure Hunt and Suncatcher Craft: Part one


For the past couple years I always felt a twinge of envy when seeing this suncatcher craft posted around the internet (here, and here). I wanted to do this craft with my son! But with the mild winters we have where we live, I didn't even consider it. What would be the point? I thought, the ice would melt entirely too fast! I envisioned these icy ornaments decorating the yards of their crafters all winter long. Lucky people!

It wasn't until the other day in the midst of a cold snap that I realized the flaw in my thinking. It's cold right now! Temperatures were predicted to dip into freezing level all week long. I realized that this was the time to do it. So what if we only had a few days to enjoy our craft before it disintegrated? The important part was that we had those days to enjoy it. Besides it's all about the process anyway, right?

Once I got this idea planted my head, my son and I were off and running on our quest to gather the material to use. We headed for my favorite wooded trail in our local park system and proceeded to collect items from the forest floor. I prefer to call this part "hunting for treasure."

Treasure Hunt 

Running for treasure
Showing me lichen
Filling up his treasure bag
Close up of treasure bag. Tutorial can be found in Amanda Soule's Book The Handmade Home.
Collecting berries
Toting along his treasure bag, Bode eagerly started filling it with all sorts of natural objects: pinecones, pine needles, oak leaves, lichen, moss, branches, and berries. I took advantage of teaching opportunities when I saw them:
  • "Pinecones house the seeds of pine trees."
  • "Why do you think they call this lichen "Old Man's Beard"?"
  • "Why do you think they call this fern "sword fern"?"
  • "Why do you think the trees grow so tall?" 
His interest was piqued about the wonders of this majestic forest and he came up with some of his own questions as well, such as: "How can trees breathe in the bad stuff and breathe out the good stuff if they don't have any mouths, how is that even possible?"
I tried to explain the best I could in his terms that the trees were able to absorb the carbon dioxide in the air through teeny holes in the surface of their leaves. It is this way too that they release the oxygen.

After the hunt was over we headed home to craft!

Read the next post here to hear how our adventure continued!


Pin It!

Treasure Hunt and Suncatcher Craft: Part two

Making our icy suncatchers (Please see here for Part one)

Assessing our treasure
Assembling suncatcher
All ready to go into the freezer!
So when we got home we sorted through and arranged the objects in pie tins.  When adding water, most of the things floated to the surface so we realized that putting any time in the arrangement of the objects was kind of futile. Bode had the good idea of adding food coloring. I added a little bit to my suncatcher, and, Bode, well, let's just say I turned around for a moment and when I turned back all the food coloring bottles were empty. LOL. Oh well, It gave me the opportunity to talk about the words "tranlucency" and "opacity". I placed a looped piece of twine that tied at one end and submerged it halfway in the water. I then put the pie tins in the freezer overnight. My pie tin ended up leaking so I transferred it to a baking dish. We also ended up making a mini one with leftover materials.

The end product! Very nice I think!
The next morning we hung them up and I was really pleased. The term suncatcher is really appropriate as the ice intensified the brightness of the light shining through them (well, on mine and the little one). Bode's was densely colored, but still it was beautiful in it's own right. We had fun. And I am happy to say after 3 days, 2 still remain hanging!


Pin It!

A visit to the local raptor center

My son and I had a great day yesterday. We are fortunate to have a local Raptor Center in our town, and so yesterday I decided to pay it a visit.  It had been a long time since we had gone there.
A couple of years before Bode was born I volunteered there for about 4 hours a week for a year. It was a pretty incredible experience, which I remember with fondness. It is always so nice to be back there again in the presence of all those grand birds.
Bald Eagle

Kites
Spotted owl
We enjoyed walking around and stopping at each cage. I read the stories out loud about why the birds came to be at the center - many got hit by cars, a few had congenital defects and were abandoned when young, and some fell from their nests. We greeted them saying their names that we learned from the placard - Hermione, Tristan, Luna, Shenoa, etc.
After our walk we gathered in the pavilion to hear a talk about the center and the birds.

What we learned:
  • Birds that live at the raptor center are there because they cannot survive in the wild due a birth defect or an injury.
  • Raptors are different from other birds because they hunt, kill and eat small animals such as birds, mice, lizards, snakes, etc.
  • Raptors are exceptional hunters because of their keen eyesight. If a raptor was at one end of a football field and someone was holding a newspaper at the other end of the field, a raptor would be able to see the individual letters printed on the newspaper. 
  • Raptors eat their prey whole, bones and all. 
  • They are different from other birds of prey because they catch their prey with their talons, while non-raptors that hunt and eat live animals kill their prey with their beaks.
  • There are 7 different kinds of raptors: Eagles, hawks, owls, kites, ospreys, vultures, & falcons. Turkey vultures are kind of an anomaly to the group because they are not really birds of prey, and only feed on dead animals.
  • The peregrine falcon is one of the fastest birds on Earth. When it is diving for prey it can reach speeds up to 243 mph. 
  • Crows that are human imprints can mimic human voices. 
  • Kites are loud. (This is the 1st answer that Bode said when asked what he learned today).

After our visit today I dug up these super cool posters that identify different birds and put them up on Bode's wall. I got them for a song at a yard sale a couple years ago (like a buck a piece). They were going for $20 at the center today. I love that!


Pin It!

Snowman craft


I love my job as a preschool teacher. My most favorite part is coming up with craft projects that the children actually can do themselves. Nothing bugs me more than seeing preschool crafts where it is obvious the teacher did the entire thing his- or herself. Believe me, I'm all about helping the kids out, but I make them do what they can on their own. This snowman project was inspired by a Christmas card that I helped my son make for his grandparents. The preschoolers (ranging in age from 2-6 years old) had the fine motor skills necessary to do most of the project with little assistance and see it through to completion.

Materials required:
  • white, black, red and orange construction paper
  • small hole punch
  • circle punch (I used Martha Stewart 1 inch wide punch) or scissors and circle template
  • light colored pencil 
Before beginning an adult cuts out black construction paper into a quarter sheet for background. Cut out orange carrot nose, and red hat and scarf.
Step 1: Tear a white strip of paper for the ground. Most of the children needed hand-over-hand assistance with this part.
Step 2: Glue the torn paper onto the bottom of the black paper. Trim the white paper that extends over the edge of the black paper so that they are the same width.
Step 3: Punch out 3 circles from white paper for snowman's body.
Step 4: Punch out 5 black dots with hole punch for eyes and buttons.
Step 5: Glue circles one on top of the other to make the snowman's body. Glue on snowman's eyes, and buttons. Glue on carrot nose, hat and scarf .
Step 6: Punch out white dots with hole punch. Glue the white dots onto black paper to make it look like snow is falling.

Step 7: Draw on stick arms with light colored pencil. Masking tape or brown colored art tape cut in thin strips can be used also.
Step 8: Glue on moon if you want. Moon is made by placing cut out circle in circle punch part way and punching it out.
Finished! Hang up on wall and enjoy!


Pin It!