Two days ago was the first day of Spring. I had noticed the signs coming on for awhile. Crocuses and daffodils poking up from the thawing soil, with their flowery heads opening as if to say "hi"; drowsy bees stumbling out of their wintery sleep half-awake; and the plum trees — wow-the-plum-trees! — with their spectacular show of abundant pink blossoms lining our streets. How impossible it would be not to notice these harbingers of Spring!
So it was with quite dismay, but also with excitement and jubilance that we greeted Day #2 of Spring. When we awoke and looked out our windows all we could see was a thick! blanket of snow in every direction (an unusual occurrence at any time of year in our town, not to mention late March!). Schools were cancelled, snowmen were built, snowball fights were had, and hot cocoa sipped.
Now it is Day #3. Streets are clear of ice and snow. We went back to work & back to school, re-emerging mid-week as if it was a Monday. However since we knew we only had a day more until the weekend, there was a sense of relief felt, instead of the stress that a Monday brings.
Driving home and witnessing the snowstorms aftermath, it became apparent that not all living things fared well from the tardy wintery weather. Every single plum tree was split, and their blossom-covered limbs lay sadly around their base awaiting clean up. They just could not withstand the weight of the snow, and snapped under the pressure. It was really a disheartening sight.
From it, though, this craft was born: "Ode to a Plum Tree" — a celebration of Spring — yes — but also a tribute of all those trees with their downed limbs. Next time our town will be all the wiser, and will be whacking that snow out of those trees early on!
I did this project as a joint activity with my son, as sometimes I think it is just more enjoyable for him to have his mama on board.
Materials used:
- Yellow, light blue, and green tissue paper cut in squares
- Bright pink tissue paper, larger pieces cut and crumpled up
- a square of mat board
- Pencil
- brown construction paper
- Sta-Flo liquid starch
- paint brush
- glue
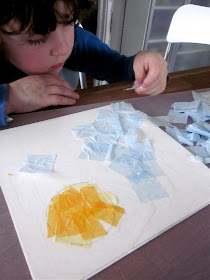
I drew a circle for the sun with a pencil. We then covered the board with the liquid starch and pressed tissue paper squares down, yellow for the sun and blue for the sky, in their respective places. I encouraged overlapping, and we periodically painted more liquid starch on top to flatten the paper down.
I outlined my son's arm and hand on brown construction paper. I cut it out. I had him glue it down on the board.
We then pressed crumpled up pink tissue paper onto glue that was dotted all around the tree.
For the last step, we put green tissue paper grass on the bottom.
All done! A pretty display to hang in his room!
If you liked this post and you want to stay informed of more kid activity ideas I post or find around the blogosphere, remember to "like" me on my Facebook Page! Thank you! Have a wonderful day!


Stopping by from Kid's Co-Op Linky! Super cute Cherry Blossom-- love tissue paper art! My son did one when we learned about George Washington over President's Day!
ReplyDeleteKristina @ School Time Snippets
Hi Kristina! Thank you!
DeleteThat came out really cute..love it!
ReplyDeleteThanks for sharing on Hey Mom, Look What I Did at Adventures In Mommy Land...hope to see you again soon!
Thank you! :)
DeleteWhat a great way to use a handprint! Did you read a book to go along with this craft?
ReplyDeleteIt's as if you read my mind! Pairing my craft projects with books have been on my mind lately! This was a really spontaneous craft project that was sparked by a snow day and the tree limbs lying all around. So I didn't have a book on hand, but when I do this with my preschoolers, I will check out what they have out there in terms of books. This post was originally "Ode to a Cherry Tree", but then I realized what I thought were cherry trees were actually plum trees. Something I actually would have realized if I thought harder about it. Obviously the tissue paper art could be applied to plum or cherry or any blossoming tree for that matter. Thanks for stopping by and checking it out!
ReplyDeletegreat project! thanks so much for sharing on craft schooling Sunday!
ReplyDeleteLove it! Absolutely adorable!
ReplyDeleteThanks for sharing on Kids Get Crafty!
Maggy & Alissa
Oh beautiful - I love the layered paper. Thank you for sharing with the Kids Co-op :)
ReplyDeleteOh, how beautiful!! I love it. Thank you for sharing at Sharing Saturday!
ReplyDeleteWhat a cute project - turned out so great!! Thanks for linking up to TGIF! See you tomorrow!
ReplyDeleteBeth =-)
Oh, I love this! Thank you for sharing with Tuesday Tots! I have pinned it :)
ReplyDeleteThis is a lovely spring project! Thank you so much for sharing it with our Spring Carnival. :) I featured your post here: http://sunnydaytodaymama.blogspot.co.uk/2012/04/all-year-round-week-eight-7-spring.html
ReplyDelete